How To Make A Sofa Tray Table
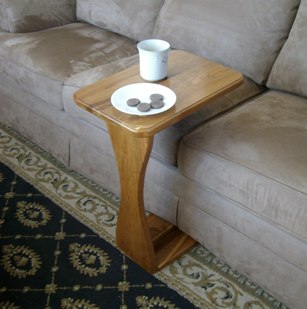
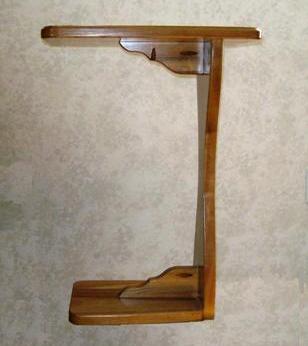
With the right plans, materials, and equipment, you can construct a Sturdy TV Tray Table, as shown here.

Materials
- 1" x 12" x 5' Boards: One Pieces
- 1 1/4" Kreg Screws; 1/8 lb.

- Sandpaper
- Wood Filler and Glue
- Satin Finish Polyurethane Poly

Step 1: Cut the Snack Table Pieces - Determine the desired size of the Snack Table
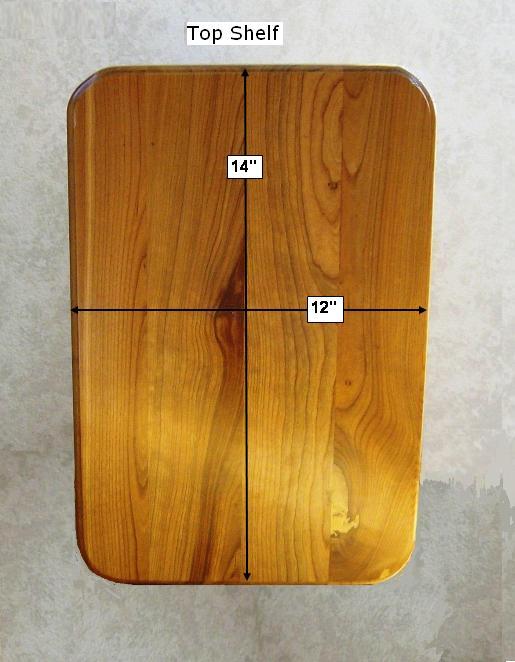
- Select the 1" x 12" stock; cut one piece @ 12" x 14" for the Top
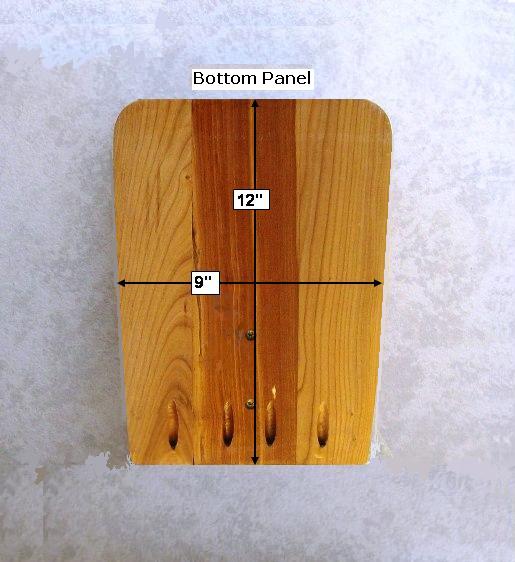
- Select the remaining 1" x 12" stock; cut one piece @ 9" x 12" for the Bottom
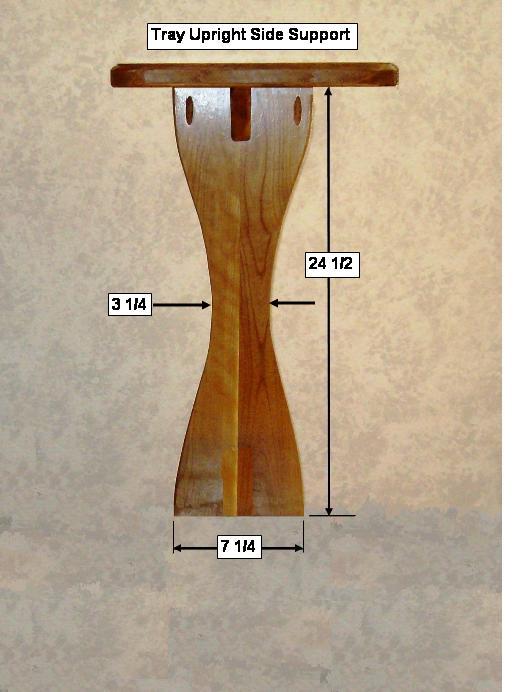
- Select the remaining 1" x 12" stock; cut one piece @ 7 1/4" x 24 1/2" for the Upright Support piece
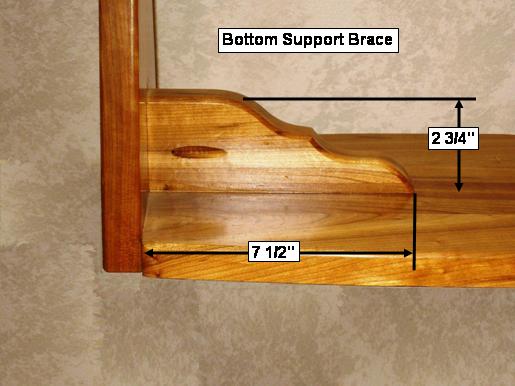
- Select the remaining stock; cut two pieces @ 2 3/4" x 7 1/2" for the Support Braces

Step 2: Machine the Pieces - Select all the pieces of the Snack Table
- Select the Top; round the corners with a band saw; router the edges with a rounding bit
- Select the Bottom; round the two edges that "do not" connect to the Upright Supoort piece; router the Bottom piece (not the back edge that connects to the Upright Support piece); drill the four Kreg pocket holes on the bottom side, as shown above
- Select the Upright Support piece; draw and cut out a pattern to the dimensions listed above; with a bandsaw, cut out the design, and drill three pocket holes at the "inside-top" to attach the tray
- Select the Support Braces; draw and cut out a pattern to the dimensions listed above; with a bandsaw, cut out the braces and drill the pocket holes (one on each side); drill one extra pocket hole in the Top Brace to attach it to the top tray
Step 3: Assemble the Snack Tray Pieces - Select all pieces
- Use the Kreg Pocket Hole Jig System
 ; use four Kreg screws to attach the Bottom panel to the Upright Support piece, as shown above ; use four Kreg screws to attach the Bottom panel to the Upright Support piece, as shown above
- Select the Bottom Brace; center it upon the Bottom; drill two holes in the Bottom board and with two, 1 1/2" screws, attach the Brace to the Bottom; with two, Kreg screws, attach the Brace to the Upright Support
- Select the Top Brace; Kreg it into position with two screws into the Upright Support
- Select the Top Tray piece; position it upon the Upright Support and Brace (allow a 3" overhang); Kreg it into position as shown above

Step 4: Finish the Tray Table - Select the finishing materials
- Fill all holes and cracks with filler; sand all surfaces
- Apply poly
- Place the Tray into position, put your cup of coffee upon it, and sit down and relax


Copyright 2016 - Wayne Murray
If you are a member of a non-profit organization and have any requests or suggestions regarding projects for your group, you can send Rod an email at: rodneyg@cheqnet.net
|


