Materials
- One Piece, 1 x 6 pine board @ 48"
- 1/4 pound, Galvenized Wood Screws @ 1 5/8"
- Two, 1 5/8" galvenized nails; One, dual-head 10-penny nail
- Sandpaper
- Exterior Wood Filler
- Exterior paint or polyurethane
Step 1: Cut the Pieces to Size - Select the 1 x 6 (5 1/2") x 48"
- Crosscut the six pieces and mark them as shown above
Step 2: Drill Holes - Select the Front, Back, two Sides, and the Bottom:
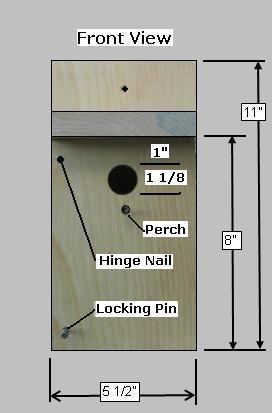
- Front - Drill 1 1/8" hole (for small birds) 1" down from the edge as shown above
- Back - Drill 1/4" hole, centered, 1" down from the edge for hanging, as shown above
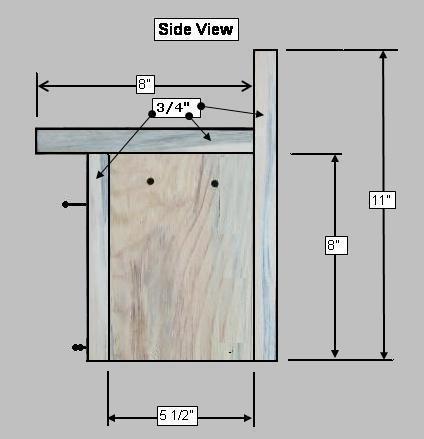
- Sides - Drill 1/4" Air Holes near the top edge, as shown above
- Bottom - Drill 1/4" Drain Holes, as shown above
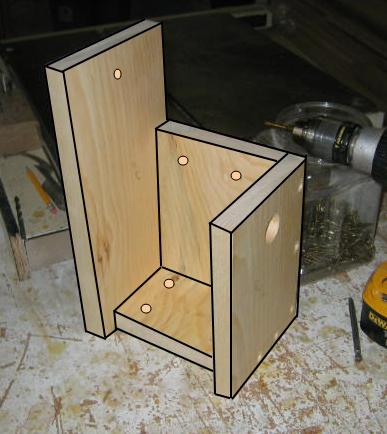
Step 3: Assemble Part of the Birdhouse - Select the Back, Right Side, and Bottom pieces
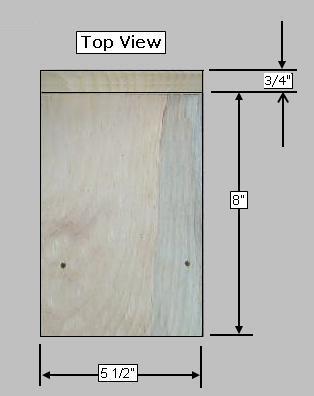
- Front - Pre-drill and screw the Back, Right Side, and the Front to the Bottom, as shown above
Step 4: Complete the Assembly - Select the Roof and the Left Side
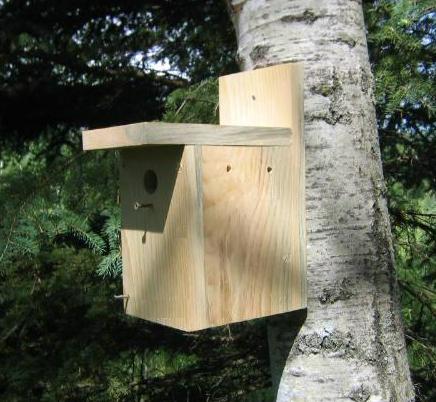
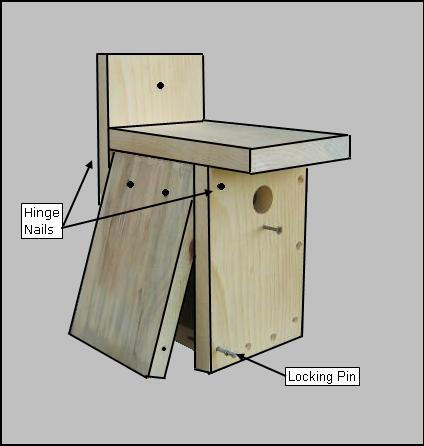
- Attach the Roof, as shown above
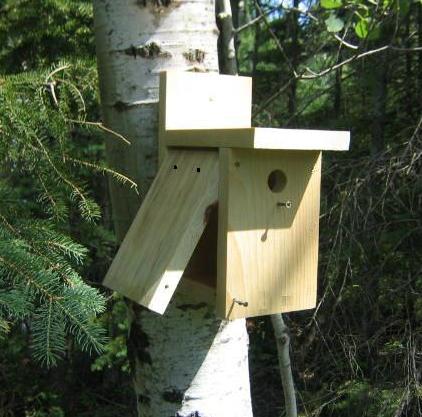
- Attach the Left Side at the top with a hinge or two nails to allow the side to swing out for cleaning, as shown above
- At the lower left corner of the Front, drill a 1/8" hole through the Front into the Side to allow a Locking Pin (Double-headed Nail) to be inserted, as shown above
- Partially attach a screw for a perch below the bird opening
- Use a Finishing Sander to sand all exterior edges
- Use exterior paint or poly and finish the Exterior Only (Note: Leave the interior unfinished)
Copyright 2013 - Wayne Murray
If you are a member of a non-profit organization and have any requests or suggestions regarding projects for your group, you can send Rod an email at: rodneyg@cheqnet.net
|