How To Make Vegetable Storage Bins
With the right plans, materials, and equipment, you can construct a Potato Bin, as shown here.
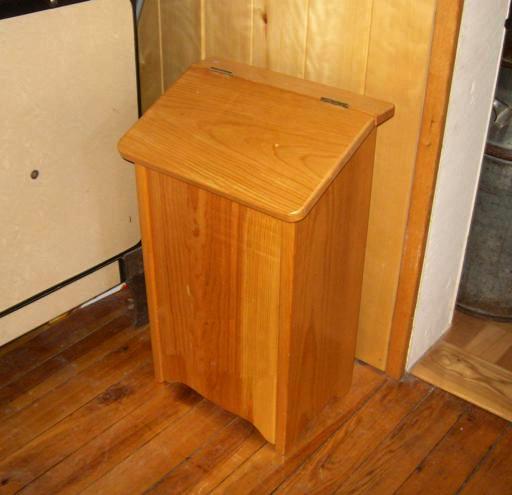
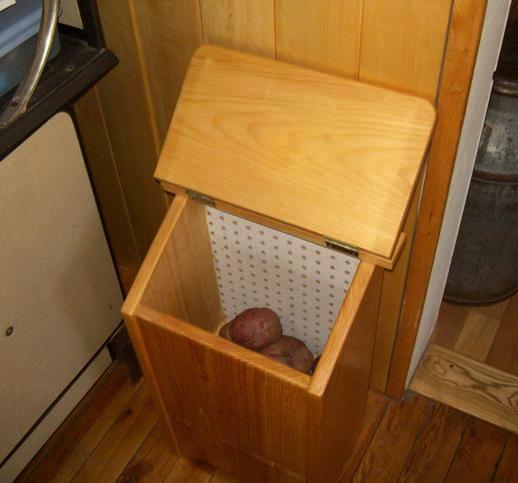
Materials:
- 3/4" x 12" x 16" Pine (or other choice of wood) : One Piece for the front
- 1" x 10" x 8' Pine: One piece for the balance of materials
- 1/4" x 24" x 24" Peg Board Material: One piece for the Back Panel
- 1 1/4" Kreg Screws; 1/4 lb.

- 1 1/2" Wood Screws; 1/8 lb.
- 1/4" Wood Plugs; Six
- Two Hinges

- Sandpaper
- Wood Filler and Glue
- Satin Finish Polyurethane Poly

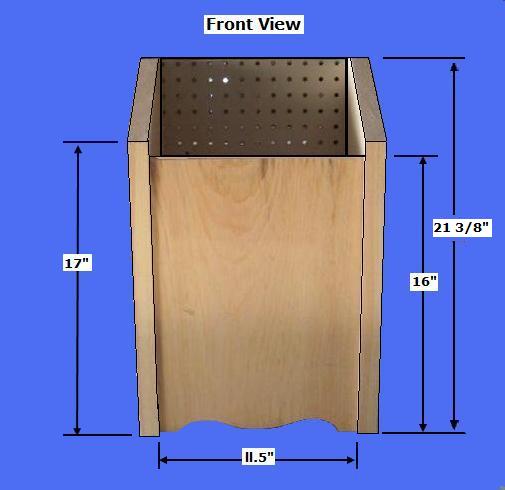
Step 1: Cut the Potato Bin Pieces - Determine the desired size of the Bin
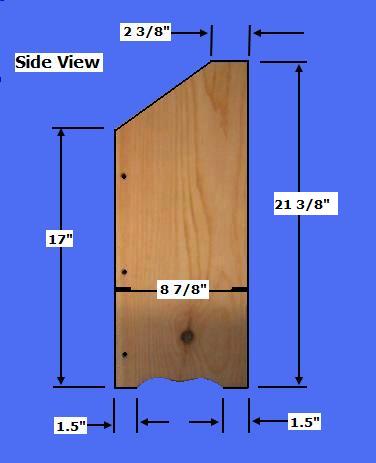
- Select the 1" x 10" stock; crosscut two pieces @ 21 3/8" for the Side Panels; Rip them to 8 7/8"; Using a Band Saw, cut out the design at the bottom edge of each; Make a dado cut on the back side, interior edge of each @ 1/4" x 5/8" to receive the 1/4" Back Panel; Drill three, counter-sunk holes along the front, exterior edge of each to receive the Front Panel, as shown above
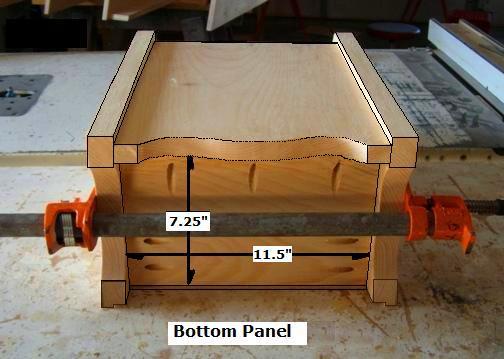
- Select the 3/4" x 12" stock; cut one piece @ 11.5" x 16" for the Front Panel; Using a Band Saw, cut out the design at the bottom edge, as shown above
- Select the 1" x 10" stock; cut one piece for the Bottom Panel @ 7.25" x 11.5"; Using the Kreg System,
 drill the holes on the two sides and front edges, as shown above
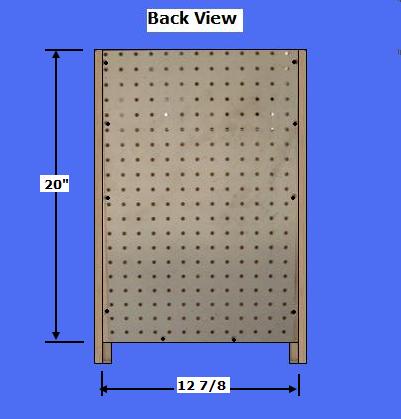
- Select the 1/4" Peg Board Material; cut one piece @ 12 7/8" x 20" for the Back Panel

Step 2: Assemble the Bin Pieces - Select the Front, Back, Sides, and the Bottom Panels
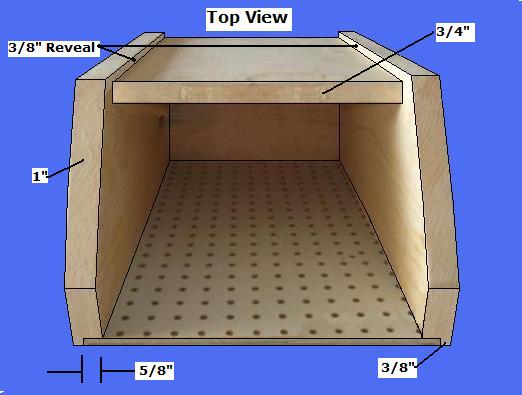
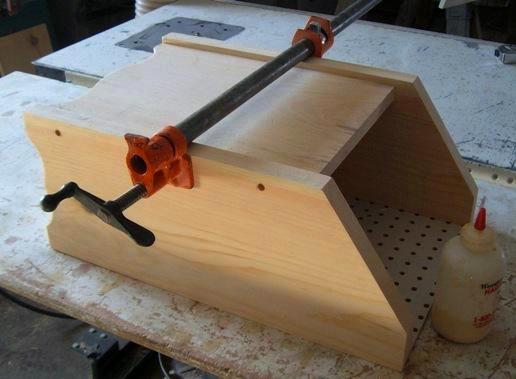
- Select the Bin Pieces; Using clamps, dry fit the pieces with the Front on a flat surface (the Back Pane facing up); Note: Use 3/8" Spacer Strips to obtain the 3/8" reveal of the Front Panel
- Select the two Side and Bottom Panel; Measure down 20" on the side, and make a mark on the interior edge to indicate the placement of the Bottom Panel; With Kreg screws, attach the Bottom Panel to the two Sides
- Select Front and two Side Assembly; Using Kreg screws, attach the Bottom to the Front Panel; Using the 1 1/2" screws, attach the Front Panel to the Sides; Fill the six holes with the Wood Plugs
- Select the 1/4" Back Panel; Using brads or 1" screws, attach the Back Panel, as shown above

Step 3: Build and Attach the Lid - Select the 1" Material
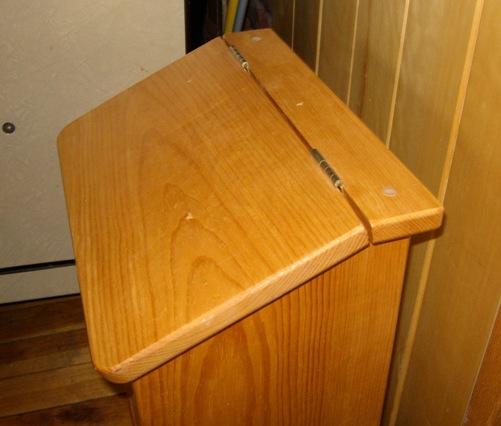
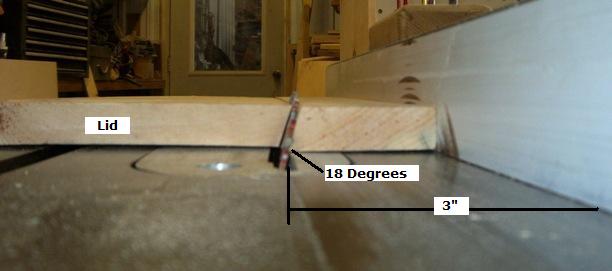
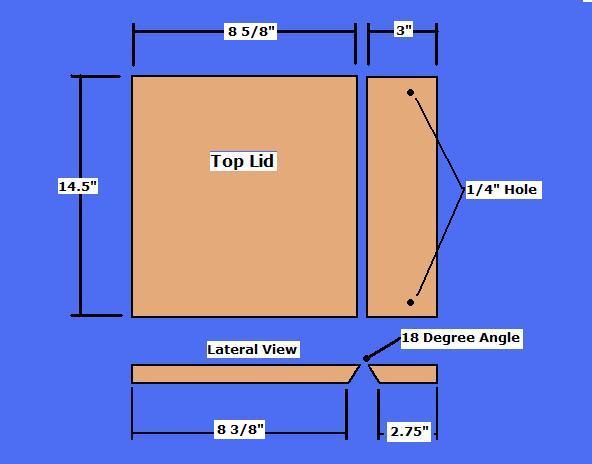
- Select the 1" Material; Crosscut two pieces 14.5"; Set the table saw to 18 degrees and Rip one piece to 8.5/8"; Rip one piece to 3", as shown above
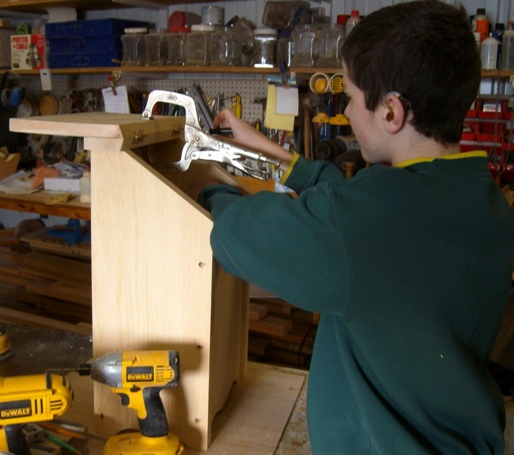
- Select the 3" piece; Center the Top on the Bin; Drill counter-sunk holes, and with two, 1.5" screws. attach it to the top edges of the Bin; Fill the two holes with Wood Plugs
- Select the Lid piece and Hinges; Attach the Hinges to the Lid; Attach the Lid to the 3" top piece
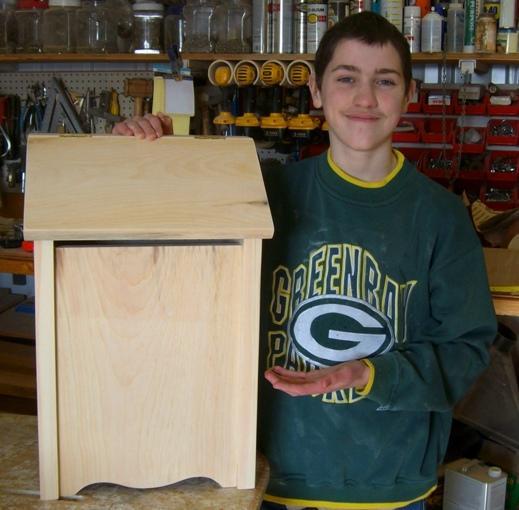
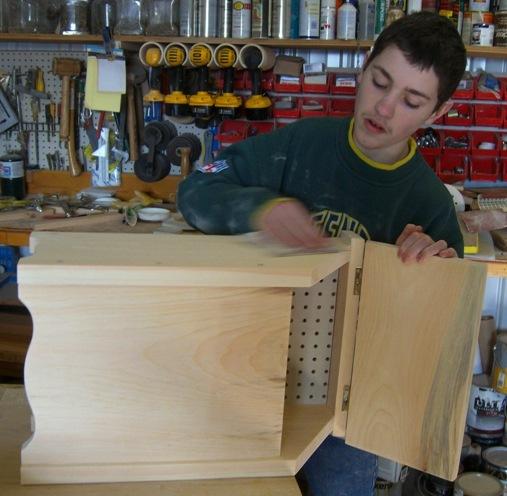
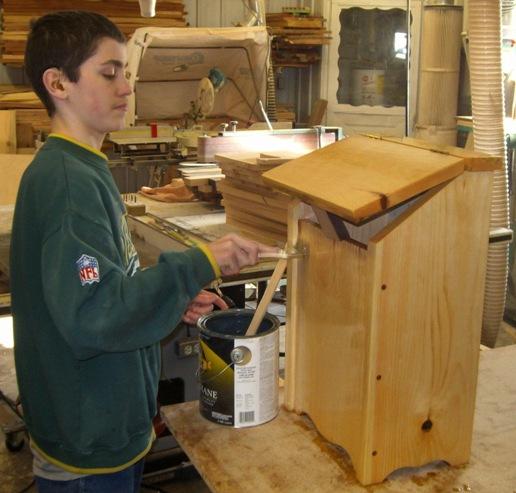

Step 4: Finish the Vegetable Bin - Select the completed Bin
- Using a Belt Sander, sand all plugs flush to the surfaces
- Fill all holes and cracks with filler; sand all surfaces
- Apply poly to the exterior surfaces only


Copyright 2013 - Wayne Murray
If you are a member of a non-profit organization and have any requests or suggestions regarding projects for your group, you can send Rod an email at: rodneyg@cheqnet.net


