How To Build Pull Out Shelves
With the right plans, materials, and equipment, you can add a Pull Out Cabinet Shelf, as shown here.
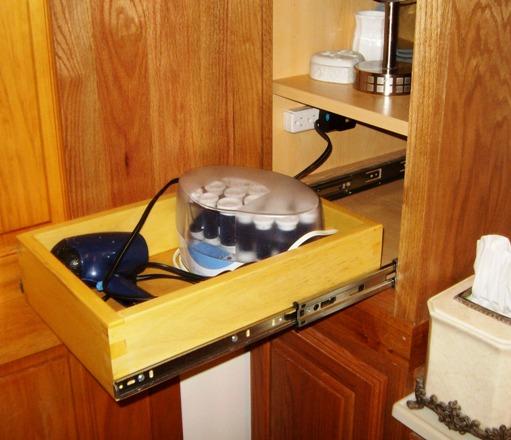
Materials:
- 3/4" x 4" x 8' Pine, Poplar, or other desired wood material: One piece for the four sides of each shelf required
- 1" x 2" x 48" Wood: Any type of wood for spacers for each slide
- 1/4" x 12" x 24" Plywood Panel: One piece for each drawer bottom Panel
- 1" Screws
- Drawer Slides: One set per shelf
- Sandpaper
- Wood Filler and Glue
- Satin Finish Polyurethane Poly

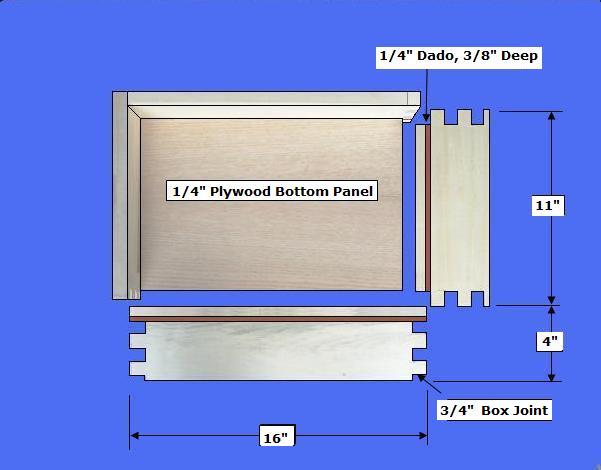
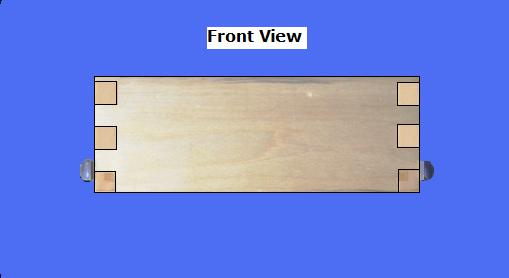
Step 1: Cut the Shelf Pieces - Determine the desired size of the Shelf: Width: Measure the width opening of your cabinet minus the thickness of the slides. Length: Measure the depth of the cabinet minus 1"
- Select the 3/4" x 4" pine stock; cut two pieces for the front/back (the dimensions here are @ 11"); Cut two pieces for the sides (these pieces are cut @ 16")
- Select the four sides and dado a 1/4" cut on the bottom/interior side 3/8" from the bottom edge, and 3/8" deep to receive the bottom panel
- Select the four sides; Cut the corners as desired with 45 degree corners, Box, or Dove Joints
- Select the four sides; Dry fit the shelf pieces; measure and cut the 1/4 plywood Bottom Panel
- Select all pieces; Sand all pieces
Step 2: Assemble the Shelf Pieces - Select all pieces
- Select the four Sides and glue them together; Allow the Bottom Panel to float
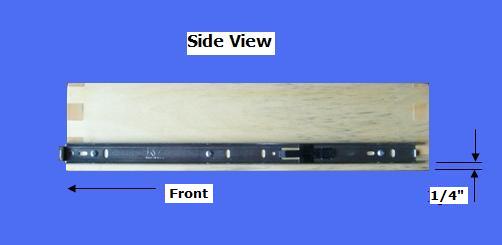
- Select the set of Drawer Glides; Separate the Glides and attach the correct half to the Shelf (one on each side), as shown above
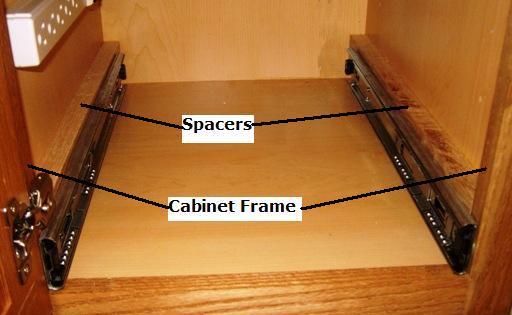
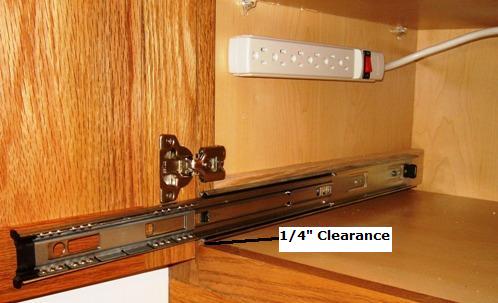
Step 3: Complete Shelf Glide Installation - Select the Glide and Spacer to be attached to the cabinet
- Select the Spacers; Measure the depth of your cabinet from the inside of the Cabinet Face Frame to the cabinet's back panel; Cut two Spacer pieces to fit. Plane or cut the thickness of the Spacers to the same thickness required to bring them even with the Cabinet Side Face Frames
- Determine the placement of the Spacers and attach them on each side of the cabinet with glue and screws, as shown above
- Select the Glide Halves; Determine the placement of the Glide Halves and attach them to the Spacers with the screws provided with the Glides, as shown above (1/4" clearance is shown here); Use a measuring block for both sides to ensure they are perfectly horizontal when attached
- Test fit the Gliding Shelf
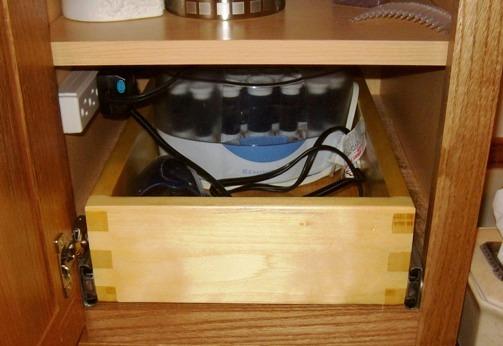

Step 4: Finish the Shelf - Select the finishing materials
- Fill all holes and cracks with filler; sand all surfaces
- Apply poly
- Enjoy your Pull-Out Shelf


Copyright 2013 - Wayne Murray
If you are a member of a non-profit organization and have any requests or suggestions regarding projects for your group, you can send Rod an email at: rodneyg@cheqnet.net


