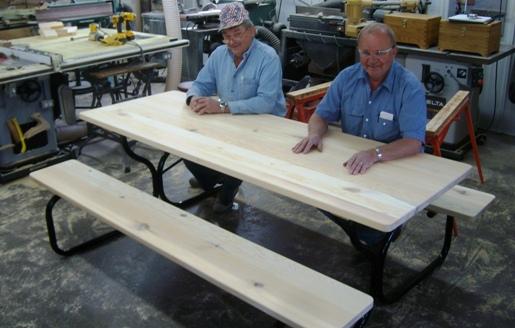
Materials
- 2 x 4 x 8': 21 Pieces
- Heavy Duty Metal Frame: Available from Park N Pool

- 2 1/2" Galvenized Wood/Deck Screws: 1/4 lb.
- 1 1/4" Kreg Screws: 1/4 lb.
- Exterior Glue
- Sandpaper
- Exterior Primer and Paint or Exterior Poly
Tools
- Wood Planer
- Table Saw
- Belt Sander or 120 grit sandpaper and a block (320 grit for finish sanding)
- Tape Measure
- Pencil
- Corner Rounding Template
- Miter Saw
- Band Saw and/or Jig Saw
- Power Drill with DeWalt 9/64 Tapered Bit with Plug Cutter for Pilot Holes
- Router with Round-over Bit
- Kreg Pocket Hole System
- Screw Gun
- Clamps: Bar Clamps and Gripping Clamps
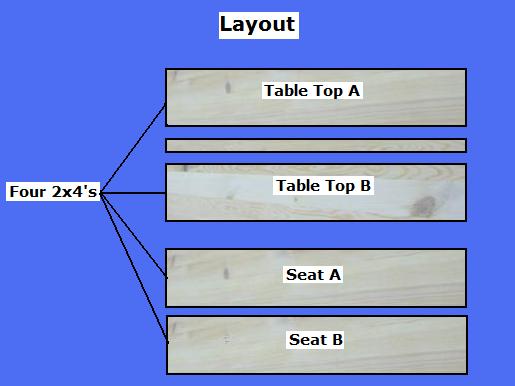
Step 1: Glue the Table Pieces - Determine the desired size of your Table or use the dimensions provided here
- Select 16, 2 x 4's: Lay them flat on a surface with the edges touching in four sets of four each (14"), ensure your Planer can plane this width; Use only three boards if necessary; Glue and Clamp "two sets" for the seats and "two sets" for the Table Top; Allow to dry overnight
- Select the four, glued Panels, "plus" one additional 2 x 4: Using a Planer, plane both sides of the 1.5" material to the thickness of 1 1/4"
- Select "two", planed Panels and the single, planed 2 x 4: Place the single, 2 x 4 between the two Panels; Using glue and clamps join the two panels to the single 2 x 4 in the middle (31.5" in width) to form the Table Top; Allow to dry overnight
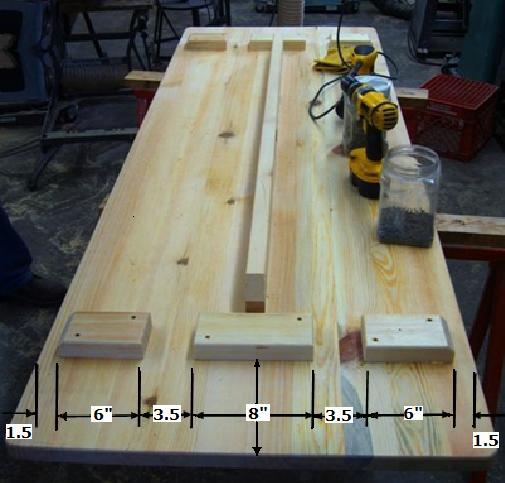
Step 2: Cut the Table Pieces - Select the pieces from Step 1
- Select the Table Top Assembly; Rip it along both edges to 30"
- Select the two, Seat Assemblies; Rip each to 12"
- Select the Table Top and Seat Assemblies; Using a Miter Saw, Crosscut the three pieces to a length of 7'
- Select another 2 x 4; Using a Miter Saw, Cut 10 Bracing Blocks; Four @ 6"; Two @ 8"; Four @ 9"
- Select three, 2 x 4's; Using a Miter saw, cut the three pieces @ 61" for Support Braces; Cut a 45-degree angle on the two, bottom edges of each, as shown above
- Select the three Support Braces; Using the Kregg System, drill pocket holes along the "connecting" edges, as shown above
- Select the two Seats and the Top Assembly; Using a Rounding Template and Band or Jig Saw, round each corner with a 2" round
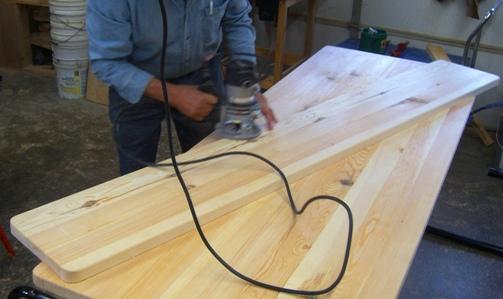
- Select the two Seats and the Top Assembly; Using a Router and 1/4" Round-over Bit, round all edges; Sand all Surfaces
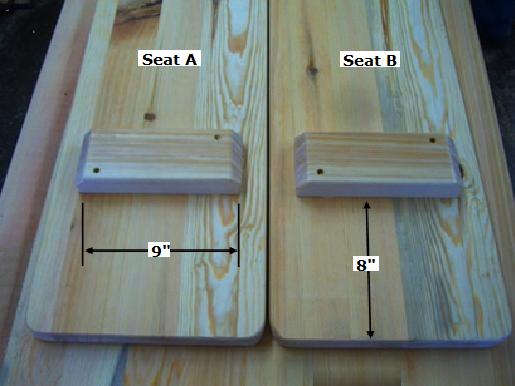
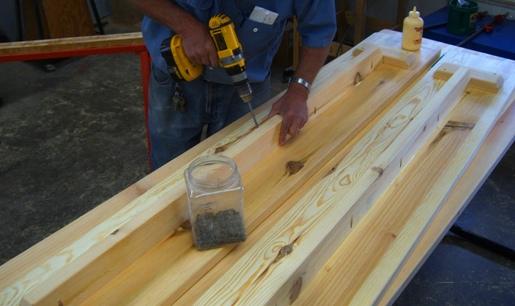
Step 3: Construct the Picnic Table - Select the sanded pieces
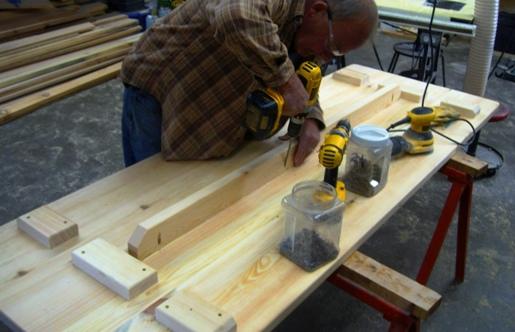
- Select the ten, Bracing Blocks; Using Glue and 2.5" Screws, attach the Blocks (pre-drill the holes), as shown above
- Select the three, Support Braces; Using Glue and Kregg Screws, center and attach the Braces to the Seats and Top, as shown above
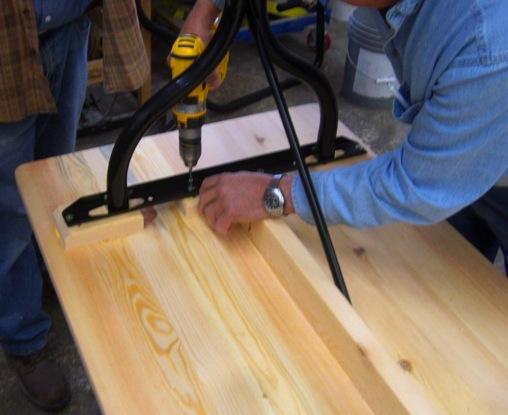
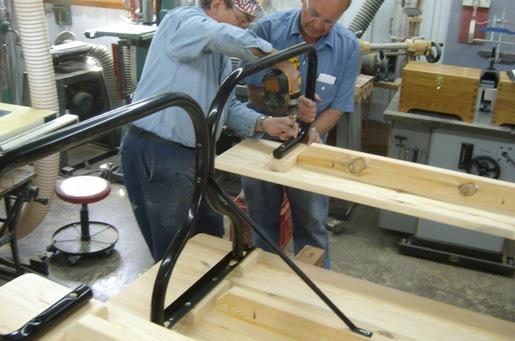
Step 4: Assemble the Picnic Table - Select the Metal Legs and Assembled Pieces from Step 3
- Select the Metal Legs; Using screws, attach them to the Bracing Blocks of the Table Top and Seats, as shown above
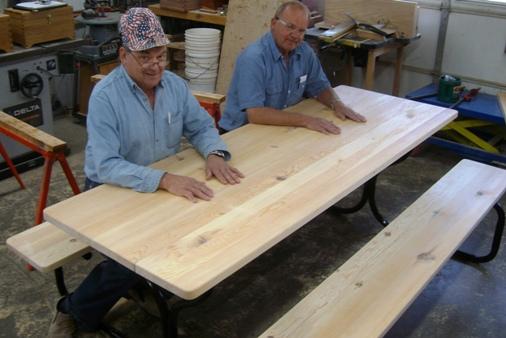
Step 5: Finish the Picnic Table - Select the completed Table
- Perform a final sanding of all surfaces
- Apply Primer/Paint or Poly to the table (Apply multiple coats)


Copyright 2013 - Wayne Murray
If you are a member of a non-profit organization and have any requests or suggestions regarding projects for your group, you can send Rod an email at: rodneyg@cheqnet.net
|

