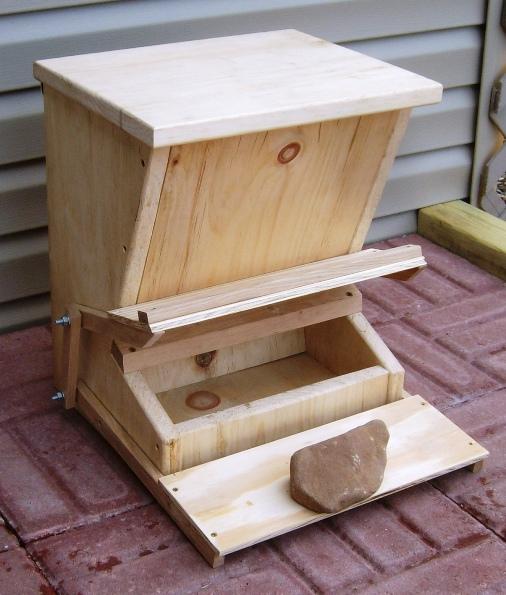
Materials
- 1 x 12 (11.5") x 10' Cedar Board: One piece
- 5/16" x 6" x 30" Plywood: One piece
- 1 1/2" Wood Screws: 1/4 lb.
- 3/4" Wood Screws: 1/8 lb.
- 1 1/4" Kreg Screws: 1/4 lb. (Optional)
- 1/4" x 20 Hex Bolts (4) with Nuts (4) and Washers (12)
- 90 degree Hinges: 2
- Sandpaper
Tools
- Table Saw
- Belt Sander or 120 grit sandpaper and a block (320 grit for finish sanding)
- Tape Measure
- Pencil
- Miter Saw
- Band Saw
- Power Drill with DeWalt 9/64 Tapered Bit with Plug Cutter for Pilot Holes
- Router with Round-over Bit
- Kreg Pocket Hole System (Optional)
- Screw Gun
- Two Clamps: Bar Clamps and a Gripping Clamp
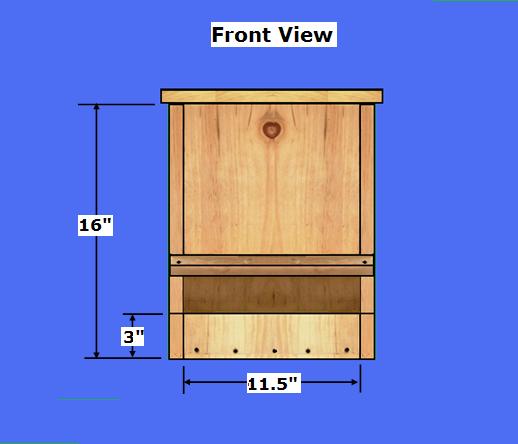
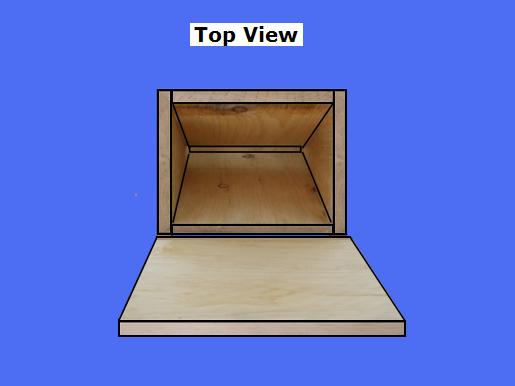
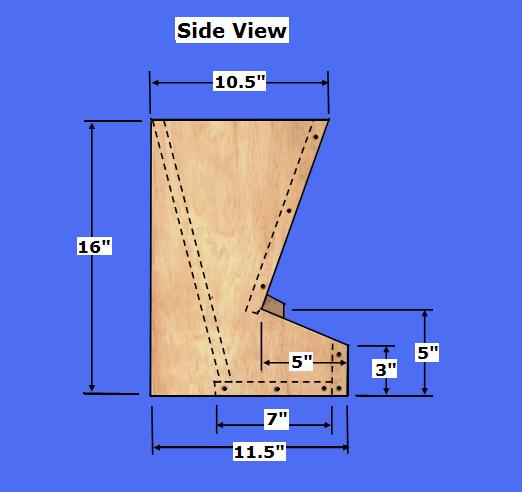
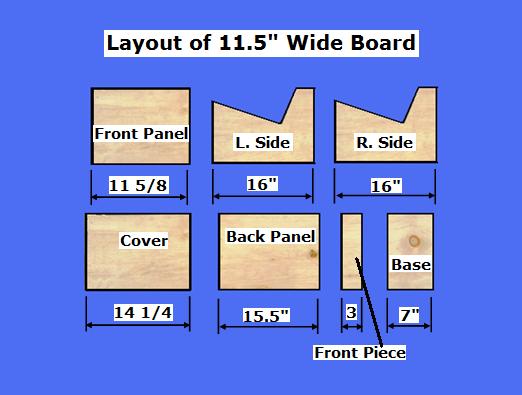
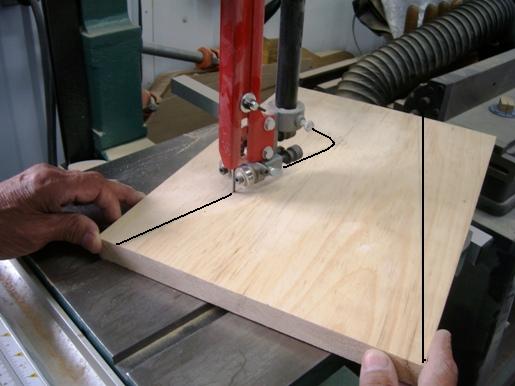
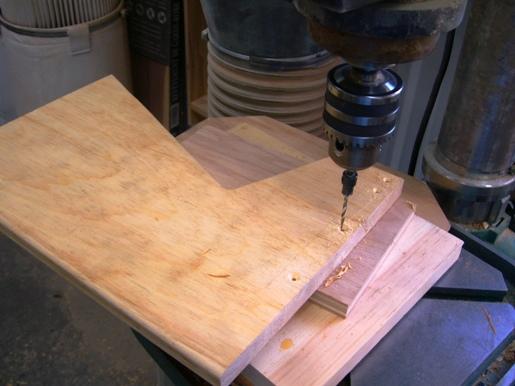
Step 1: Cut the Feeder Pieces - Determine the desired size of your Feeder or use the dimensions provided here
- Select the 1 x 12 Cedar stock: Crosscut the pieces in the Layout picture per the dimensions above
- Select the two, Side Panels: Using Band Saw, cut the profiles per the dimensions above; using a drill press, pre-drill the counter-sunk holes per the diagrams above to include the 3" Front piece
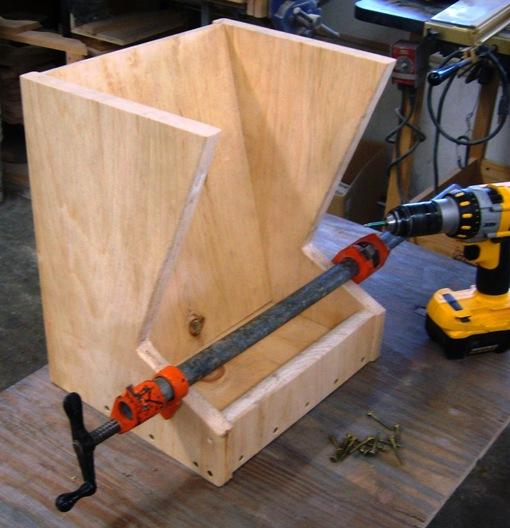
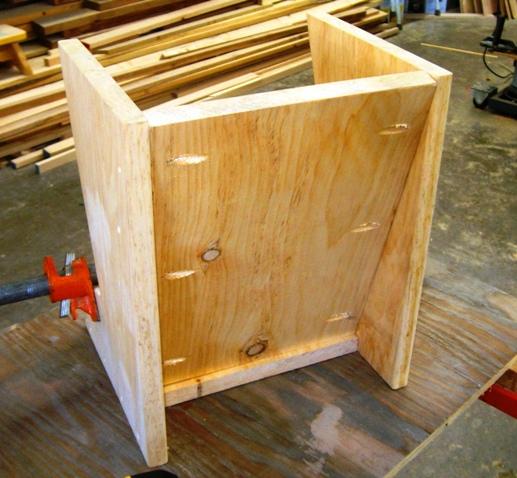
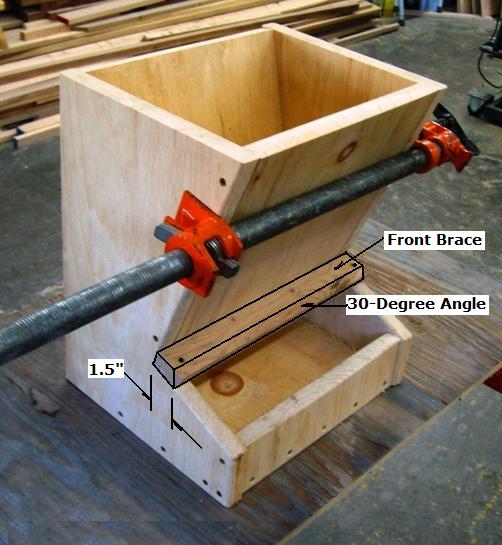
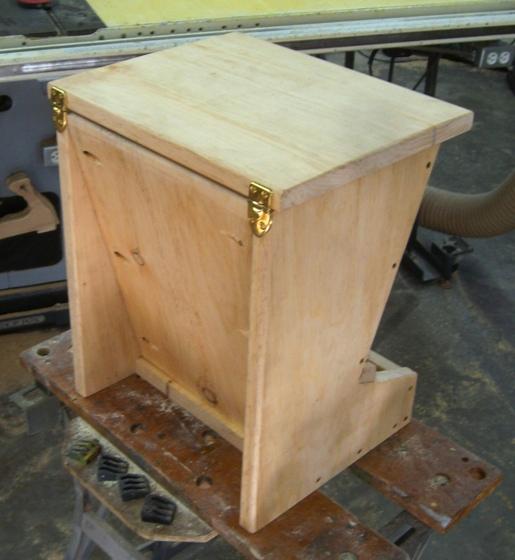
Step 2: Assemble the Feeder - Select the pieces from Step 1
- Select the two Sides, Base, and 3" Front piece; Using a Clamp and 1.5" Screws, assemble these pieces
- Select the Back and Front Panels; Using a Miter Saw, cut a 15 degree angle on the Top and Bottom edges of both pieces
- Select the Front Panel; Using a clamp, set the Front Panel in place, flush with the Top Edge; Using 1.5" screws attach the Front Panel to the two Sides
- Select the Back Panel; Using a Kreg Pocket Hole System, drill the holes and attach the Back Panel to the Side Panels; Ensure the Top Edges are all flush (If no Pocket-Hole System available, attach the Back Panel with 1.5" screws through the Side Panels)
- Select the remaining 1 x 12 Cedar Material; Cut a Front Brace @ 13 1/4" x 1.5" with a 30-degree angle, pre-drill two holes at the ends and attach with 1 1/2" screws to the Side Panels, as shown above
- Select the Top Piece and two Hinges; Attach the Hinges to the Top and Side Panels, as shown above
- The Basic Feeder is now complete; The optional Treadle can now be added, as shown below
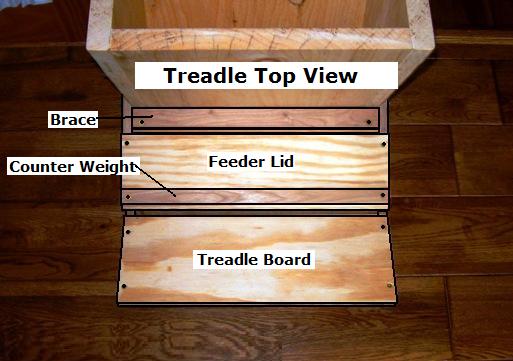
Step 3: Construct the Treadle Linkage and Lid - Select the remaining 1 x 12 Cedar Material
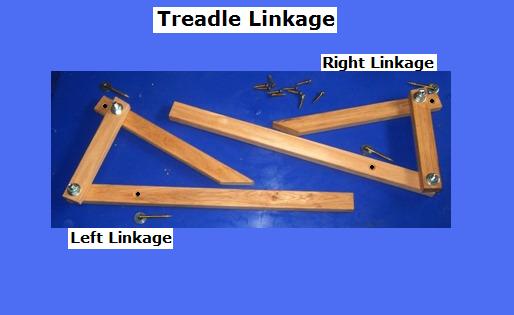
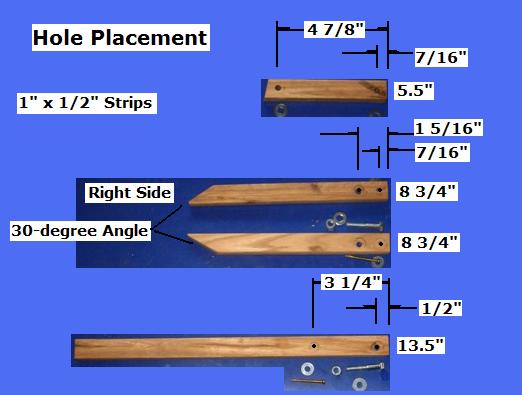
- Select the 1 x 12 Cedar material; Cut the Linkage Arm Pieces: Two pieces @ 1/2" x 13.5"; Two pieces @ 1/2" x 8 3/4" with a 30-degree angle at one end, as shown above; Two pieces @ 1/2" x 5.5"
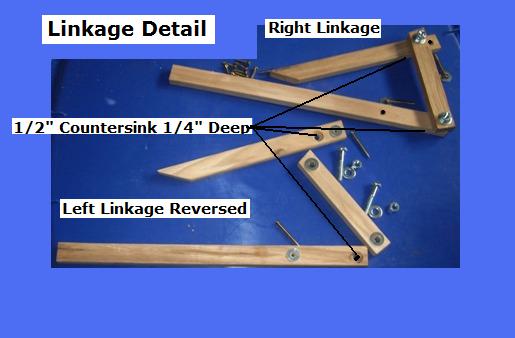
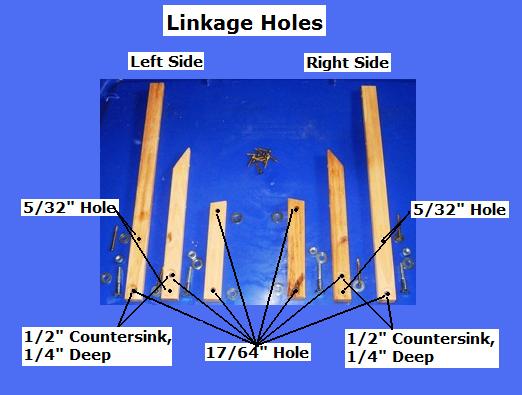
- Select the Arm Pieces; Using a drill press and three drill bits: 5/32", 17/64", 1/2", drill the Linkage Holes as shown above
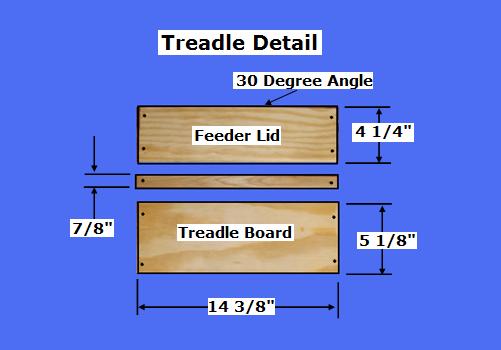
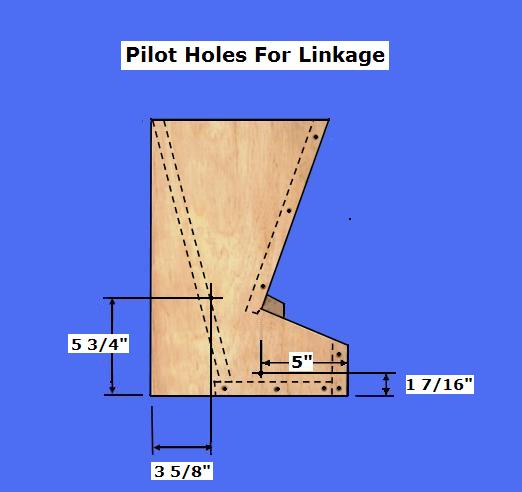
- Select the 5/16" Plywood; Cut the Feeder Lid and Treadle Board per the dimensions listed above; Drill the Pilot Holes in each corner; Sand all pieces
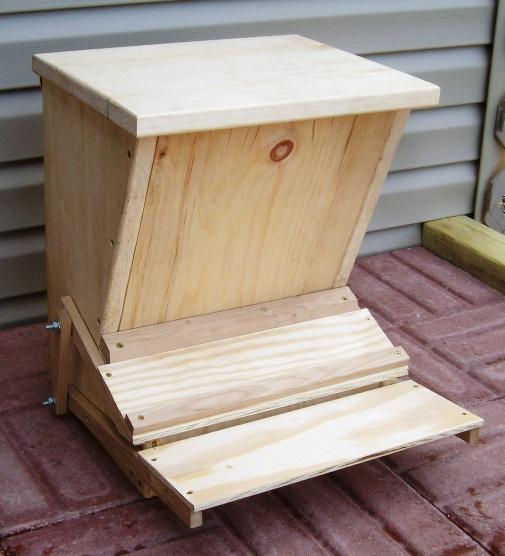
Step 4: Assemble the Lid and Treadle Linkage - Select the pieces cut in Step 3
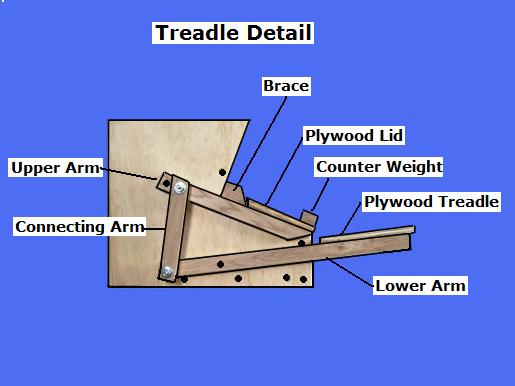
- Select the Feeder; Drill the Fulcrum/Pivot Pilot holes in Side Panels, as shown above
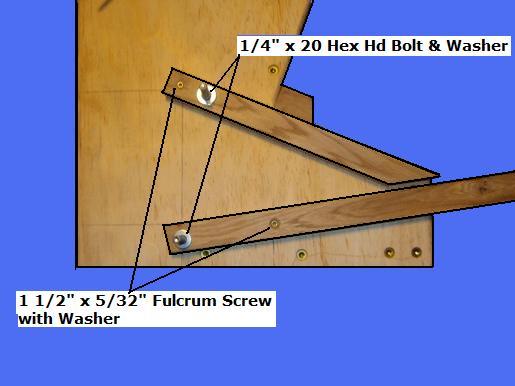
- Select the Feeder plus the Upper and Lower Linkage Arms; Insert the four, 1/4" Bolts into the Upper and Lower Arms (Hex heads fit inside the 1/2" pre-drilled, Countersunk holes)
- Select the 5/32" x 1.5" Screws and Washers; Insert the Fulcrum/Pivot Washers between the Feeder Side Panels and the Upper and Lower Arms; Using a Screw Gun, drive the 1.5" Fulcrum/Pivot screws through the arms, the washers, into the Side Panels (do not tighten completely; allow the arms to move freely riding on the washers), as shown above
- Select the Connecting Arm; Put the Washers on the Bolts protruding through the Upper and Lower Arms; Apply the two Connecting Arms; Apply the four Washers followed by the four Locking Nuts (do not over-tighten; allow the linkage to move freely), as shown above
- Select the Feeder Lid and Treadle Board; Using 3/4" Screws, attach the Lid to the Upper Arm; Attach the Treadle Board to the Lower Arm, as shown above
- Select the Cedar Material; Cut a Counter Weight piece @ 7/8"; Drill a Pilot Hole at each end; Using 3/4" Screws, attach the Weight to the Lid, as shown above
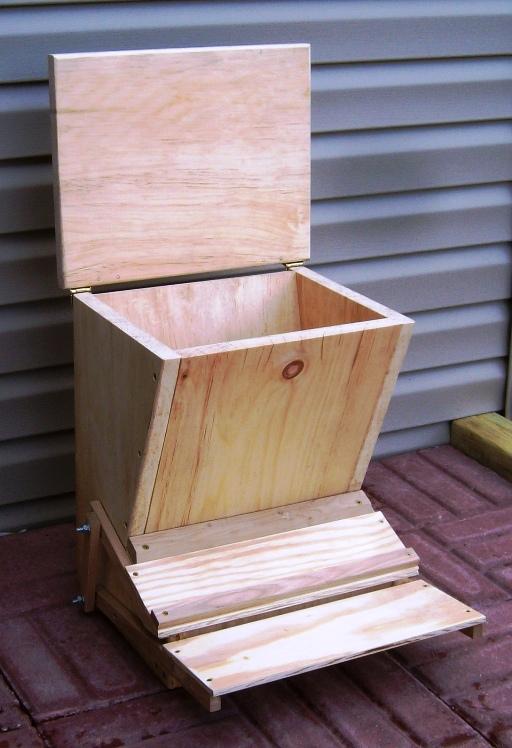
Step 5: Finish the Feeder - Select the completed Feeder
- Apply a lubricant to each of the linkage moving parts
- Counter Weights may be added or adjusted to improve the treadle movement
- DO NOT apply any poly, paint, or other chemical sealers as the birds may ingest it


Copyright 2013 - Wayne Murray
If you are a member of a non-profit organization and have any requests or suggestions regarding projects for your group, you can send Rod an email at: rodneyg@cheqnet.net
|


