Materials
- 1 x 6 x 60": One piece of lumber (Cedar is recommended) for the front, back, sides, bottom, mounting post, castle merlons
- 1 x 8 x 12": One Piece for the roof (Note: the roof is recommended to be an angled, shed type to shed water; however, this castle design is a special plan request)
- 1" Dowel Rod: Three inches for the castle turrets
- 1 1/4" Galvanized Wood Screws: 1/8 lb.
- Exterior Glue, Brads and/or Glue Gun
- Sandpaper
- Poly or Exterior Paint to decorate the exterior; DO NOT treat the interior
Tools
- Table Saw
- Belt Sander or 120 grit sandpaper and a block (320 grit for finish sanding)
- Tape Measure
- Pencil
- Miter Saw
- Power Drill with DeWalt 9/64 Tapered Bit with Plug Cutter
- 1 1/8" Paddle Drill Bit for small birds i.e. Wren, Chickadee, Warbler, etc. (Note: The size of the bird hole to be drilled depends on the size of the birds in the area; if you need assistance, consult a local ornithologist)
- Screw Gun or Screwdriver
- Hammer or Brad Nailer
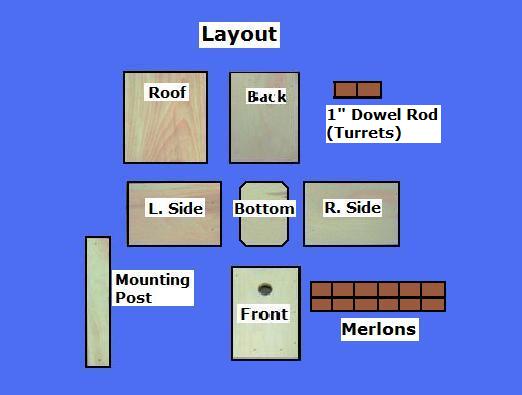
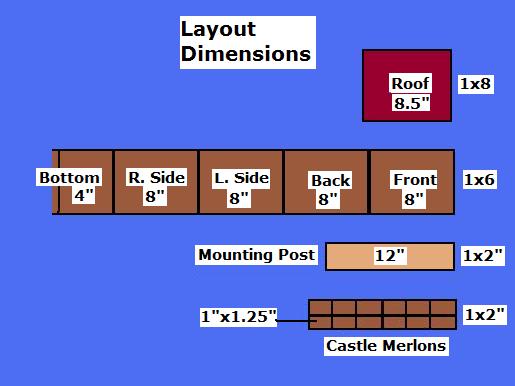
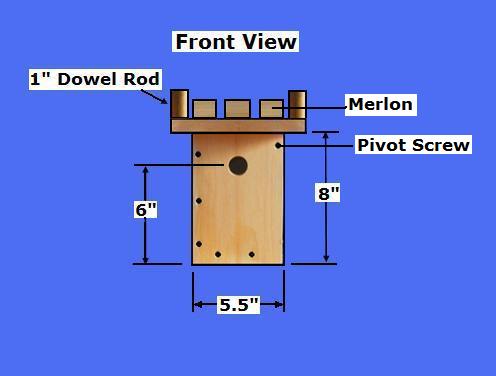
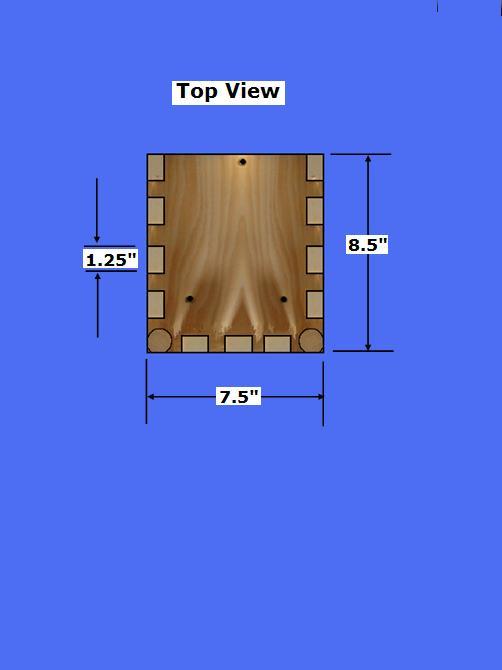
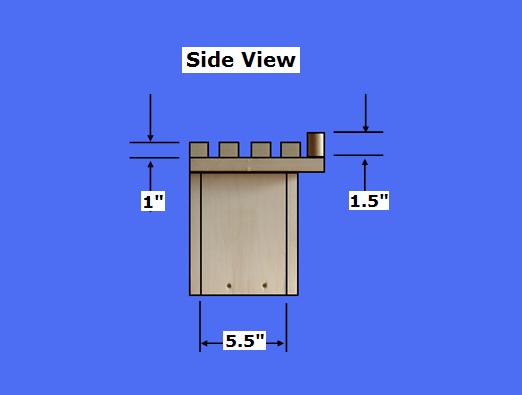
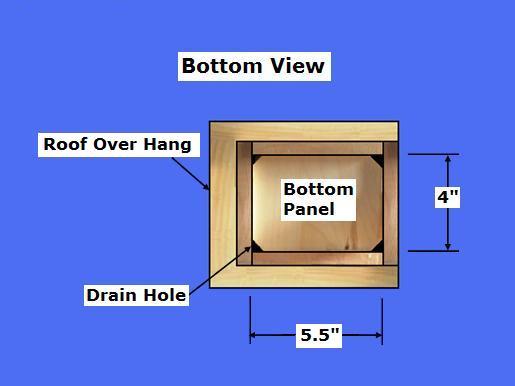
Step 1: Cut the Birdhouse Pieces - Determine the desired size of your birdhouse or use the dimensions provided here
- Select the 1 x 8 stock: Crosscut the Roof @ 8.5"
- Select the 1 x 6 stock: Crosscut the Two Sides, Front, and Back @ 8"
- Select the 1 x 6 stock: Crosscut the Bottom @ 4"; Cut the four corners @ 45 degrees for drain holes
- Select the 1 x 6 stock: Rip the remaining stock @ 2"; Crosscut one piece @ 12" for the Mounting Post
- Select the 1 x 6 stock: Rip the remaining stock @ 1"; Crosscut 11 pieces @ 1.25" for the Castle Morlens
- Select the 1" Dowel Rod: Cut two pieces @ 1.5" for the Castle Turrets

Step 2: Build the Castle Birdhouse Pieces - Select the Pieces
- Select the Front Panel; Using a 1 1/8" Paddle Bit, drill a hole centered and 6" up from the bottom edge
- Select the Bottom, Sides, Front, Back Panels; Using a 1/4' shim under the Bottom (Note: this will provide a 1/4" drip edge on the bottom of the birdhouse), Dry fit the pieces
- Using a Pencil, mark the top edge of the Bottom panel on the Front, Back and Left Panel ONLY; DO NOT Mark the Right Side Panel; This will be a hinged Side Panel for clean out
- Select the Front Panel; Using a 9/64th Tapered Bit, drill two pilot holes at the bottom edge (Drill these two holes 3/8" down from the marked lines) to receive the Bottom Panel
- Drill three pilot holes 3/8" from the left edge, along the left edge to receive the Left Side Panel
- Drill one pilot hole 1" down and 3/8" over from the top, right corner to receive the Pivot Screw

- Select the Left Side Panel; Using a 9/64th Tapered Bit, drill two pilot holes along the bottom edge (Drill these two holes 3/8" down from the marked line) to receive the Bottom Panel
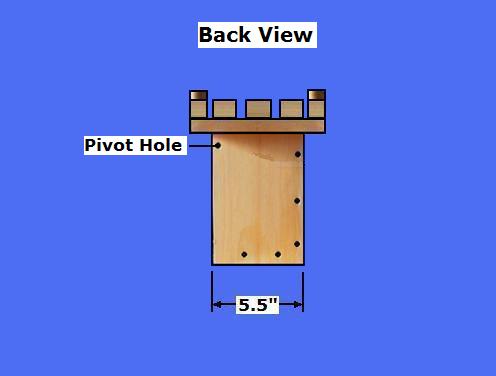
- Select the Back Panel; Using a 9/64th Tapered Bit, drill two pilot holes at the bottom edge (Drill these two holes 3/8" down from the marked lines) to receive the Bottom Panel
- Drill three pilot holes 3/8" from the right edge, along the right edge to receive the Side Panel
- Drill one pilot hole 1" down and 3/8" over from the left corner to receive the Pivot Screw (Note: This hole must line up exactly with the Pivot hole drilled on the Front Panel; Use the Front Panel as a template for drilling the hole in the Back Panel)
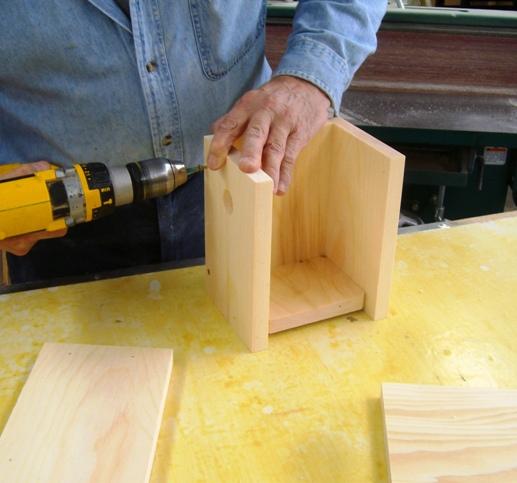
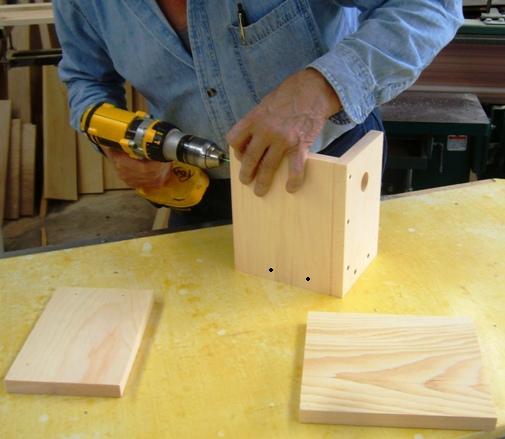
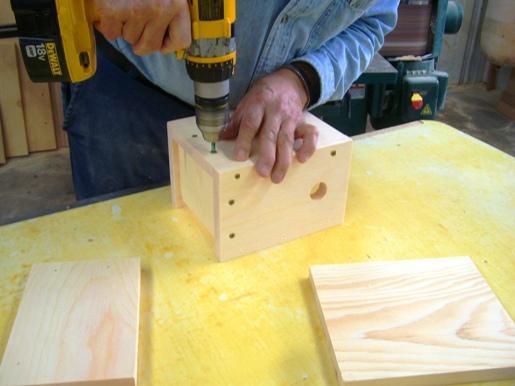
Step 3: Assemble the Birdhouse - Select the Pieces
- Select the Bottom with 1/4" shim, Left Side, Front, and Back Panels; Using three screws, attach the Front to the Left Side Panel (ensure the edges meet at the top, bottom, and sides)
- Select the Back Panel; Using three screws, attach it to the Front/Side Assembly (ensure the edges meet at the top, bottom, and sides)
- Select the Bottom Panel with 1/4" Shim in place; Using six screws, attach it to the Front-Back-Side Assembly (ensure the Bottom Panel rests on top of the 1/4" shim to provide the drip edges)
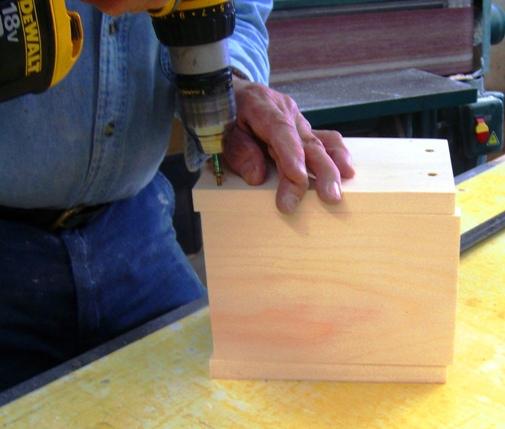
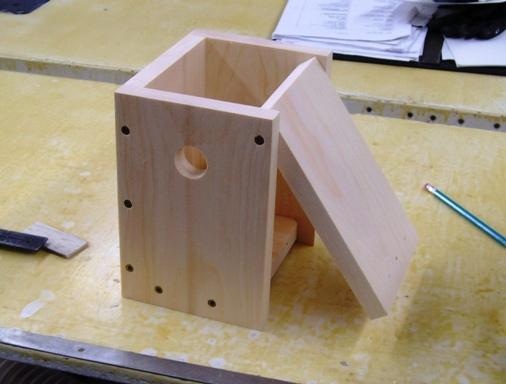
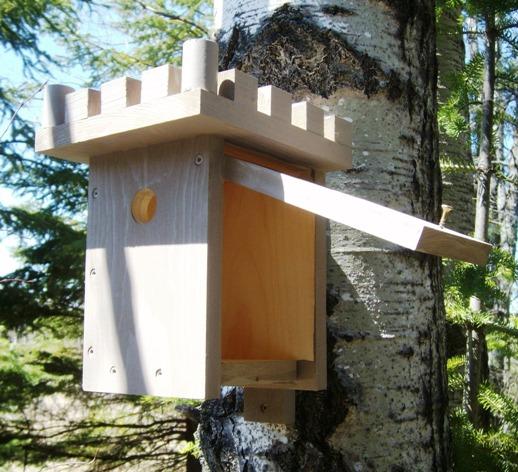
- Select the Birdhouse Assembly and the Pivot Panel; Using two screws, attach the Pivot Panel to the Front and Back Panel (Note: Leave a 1/8" gap at the top to allow the Pivot Panel to clear the Roof)
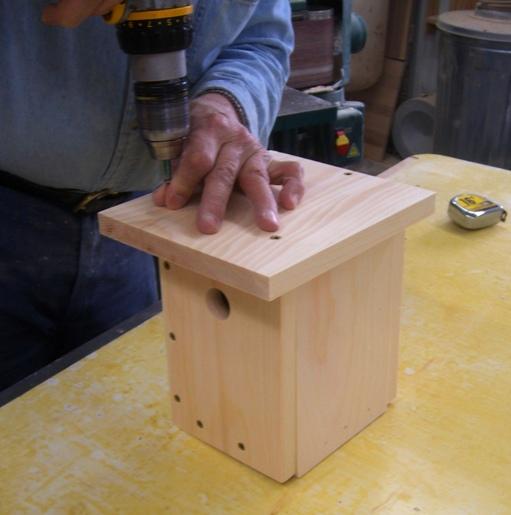
- Select the Birdhouse Assembly and Roof Panel; Using three screws, center (Allign the Roof with the back edge) and attach the Roof to the Assembly
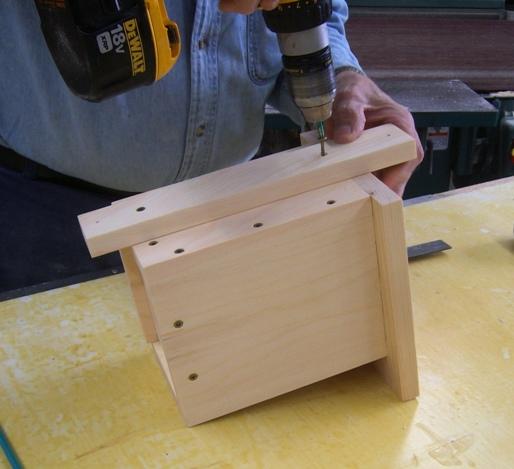
- Select the Birdhouse and Mounting Pole; Using two screws, center and attach the Pole
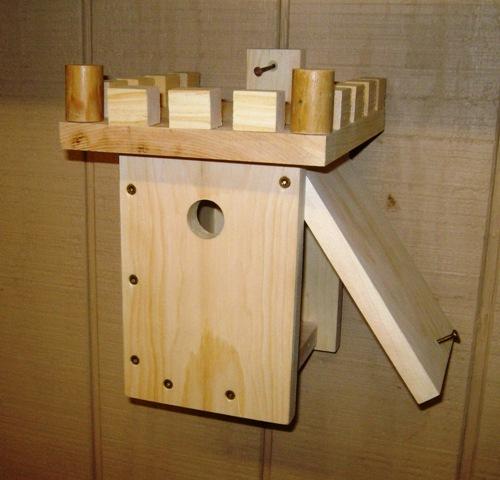
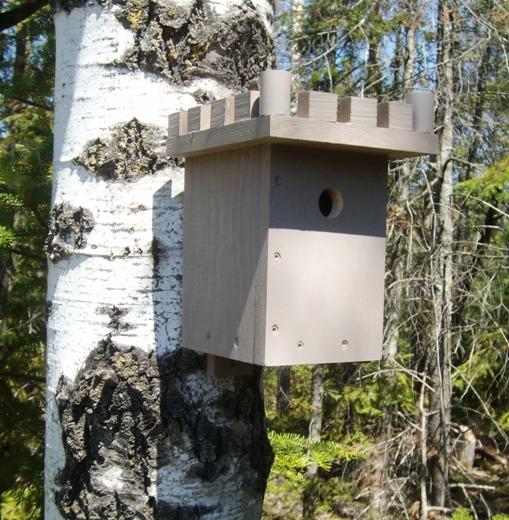
- Select the Birdhouse, Dowel Rods (Turrets), and 3/4" x 1" x 1 1/4" Pieces used as Merlons; Using Exterior Glue and/or 1 1/2" brads, attach the Merlons to the Roof as Shown above
- Select one Screw; Center and attach the screw near the bottom of the Pivot Panel into the Bottom Panel (This Screw will secure the Panel from predators and allow access for clean out)
Step 4: Finish the Birdhouse - Select the Completed Birdhouse
- Fill all holes and cracks with exterior filler; Conduct a final sanding of all surfaces
- Apply exterior stain, poly, or paint (Do not treat the interior)


Copyright 2013 - Wayne Murray
If you are a member of a non-profit organization and have any requests or suggestions regarding projects for your group, you can send Rod an email at: rodneyg@cheqnet.net
|

