How To Make Wood Animal Cremation Urns
With the right plans, materials, and equipment, you can construct a Pet Cremation Urn Box, as shown here.
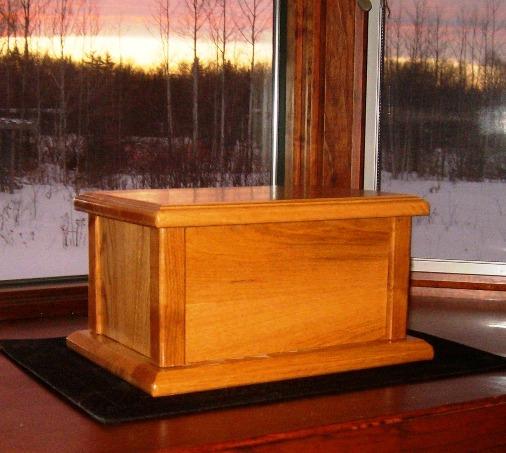
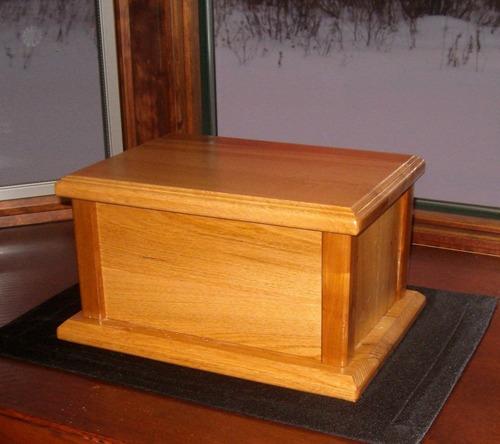
Materials:
- 3/4" x 10" x 36" Solid Oak, or wood of choice: One Piece for the Base and Top
- 3/4" x 6" x 36" Solid Oak, or wood of choice: One piece for the Front, Back, and Sides
- 1" x 1" x 24" Solid Oak or wood of choice: One piece for the four, Corner Posts
- 1 1/2" Wood Screws; Four pieces
- Sandpaper
- Wood Filler and Glue
- Satin Finish Polyurethane Poly

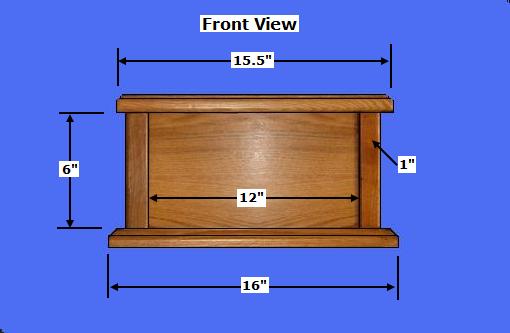
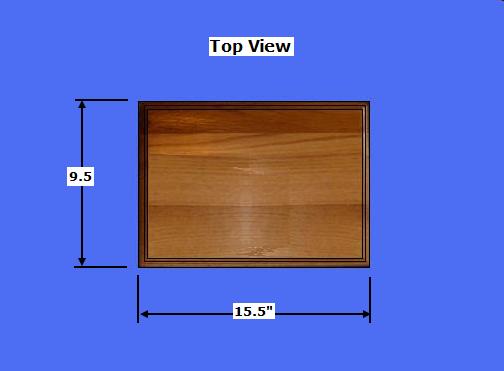
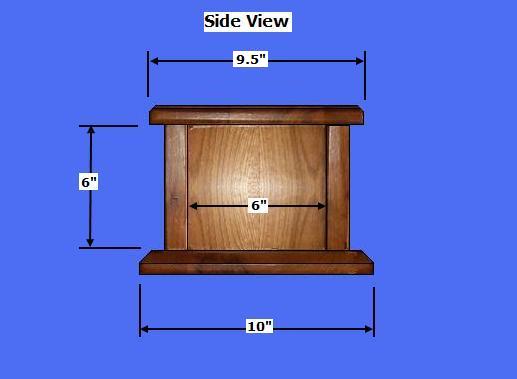
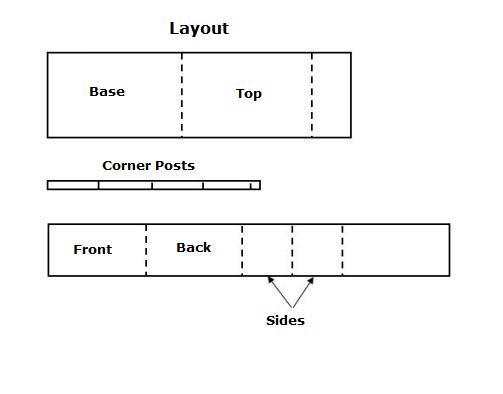
Step 1: Cut the Cremation Box Pieces - Determine the desired size of the Chest or use those provided
- Select the 1" x 1" stock; crosscut to the depth of the chest, 6"; Select a 1/8" round-over, router bit and router three edges of each post (do not router the interior edge)
- Select the 3/4" x 10" x 36" Solid Oak Material; cut one piece for the Bottom Base @ 16"; Cut a 45 degree bevel on the upper edge
- Select the remainder of the 3/4" x 10" x 36" Solid Oak Material; Cut another piece @ 9.5" x 15.5" for the Top; Select a router bit of choice and router the upper edge
- Select the 3/4" x 6" x 36" Solid Oak Material; cut two pieces @ 12" for the Front and Back Panels; Cut two pieces @ 6" for the two, Sides
- Select the pieces and sand all surfaces (not the connecting edges)
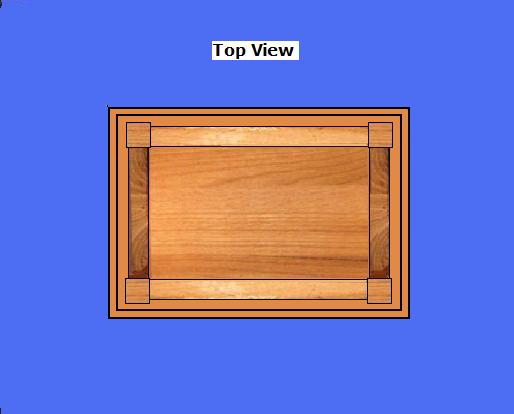
Step 2: Assemble the Chest Box Pieces - Select pieces
- Select the two Side Panels; attach the Sides to the Posts (two Posts per side) with quality glue and clamps (Note: allign the interior, non-routered edges to the side pieces), allow them to dry over night
- Select Front, Back, and two Side Assemblies; using quality glue, attach the Front and Back Panels to the Side Assemblies
- Select the Box Assembly, center and dry fit it to the under side of the Top Panel; glue it in place; allow to dry overnight
- Select the Bottom Base and the Box Assembly; Center the top surface of the Base upon the Box Assembly; use four counter sunk wood screws to attach the Base, from the bottom, to the Assembly

Step 3: Finish the Cremation Chest - Select the completed Box
- Fill all holes and cracks with filler; finish sanding all surfaces
- Apply a minimum of three coats of poly


Copyright 2013 - Wayne Murray
If you are a member of a non-profit organization and have any requests or suggestions regarding projects for your group, you can send Rod an email at: rodneyg@cheqnet.net


